Gelatos! Have you seen these things? If you love color (and who doesn't????) You are going to want these!
They are luscious, vibrant watercolors in wonderful little lipstick tubes.
They are smooth and creamy and blend easily with your fingers or you can add water and get the full watercolor effect. I fell in love just looking at them online! You can read all about them here. I ordered the full set of 28 colors from Amazon. But couldn't wait for them to come so I ran to the local art store (literally just 2 blocks away lol) and bought the Tropical set (which is not part of the full 28 set)
I could not wait to play!!!
My first foray into Gelato land is not my best work BUT I loved how the Gelatos performed.
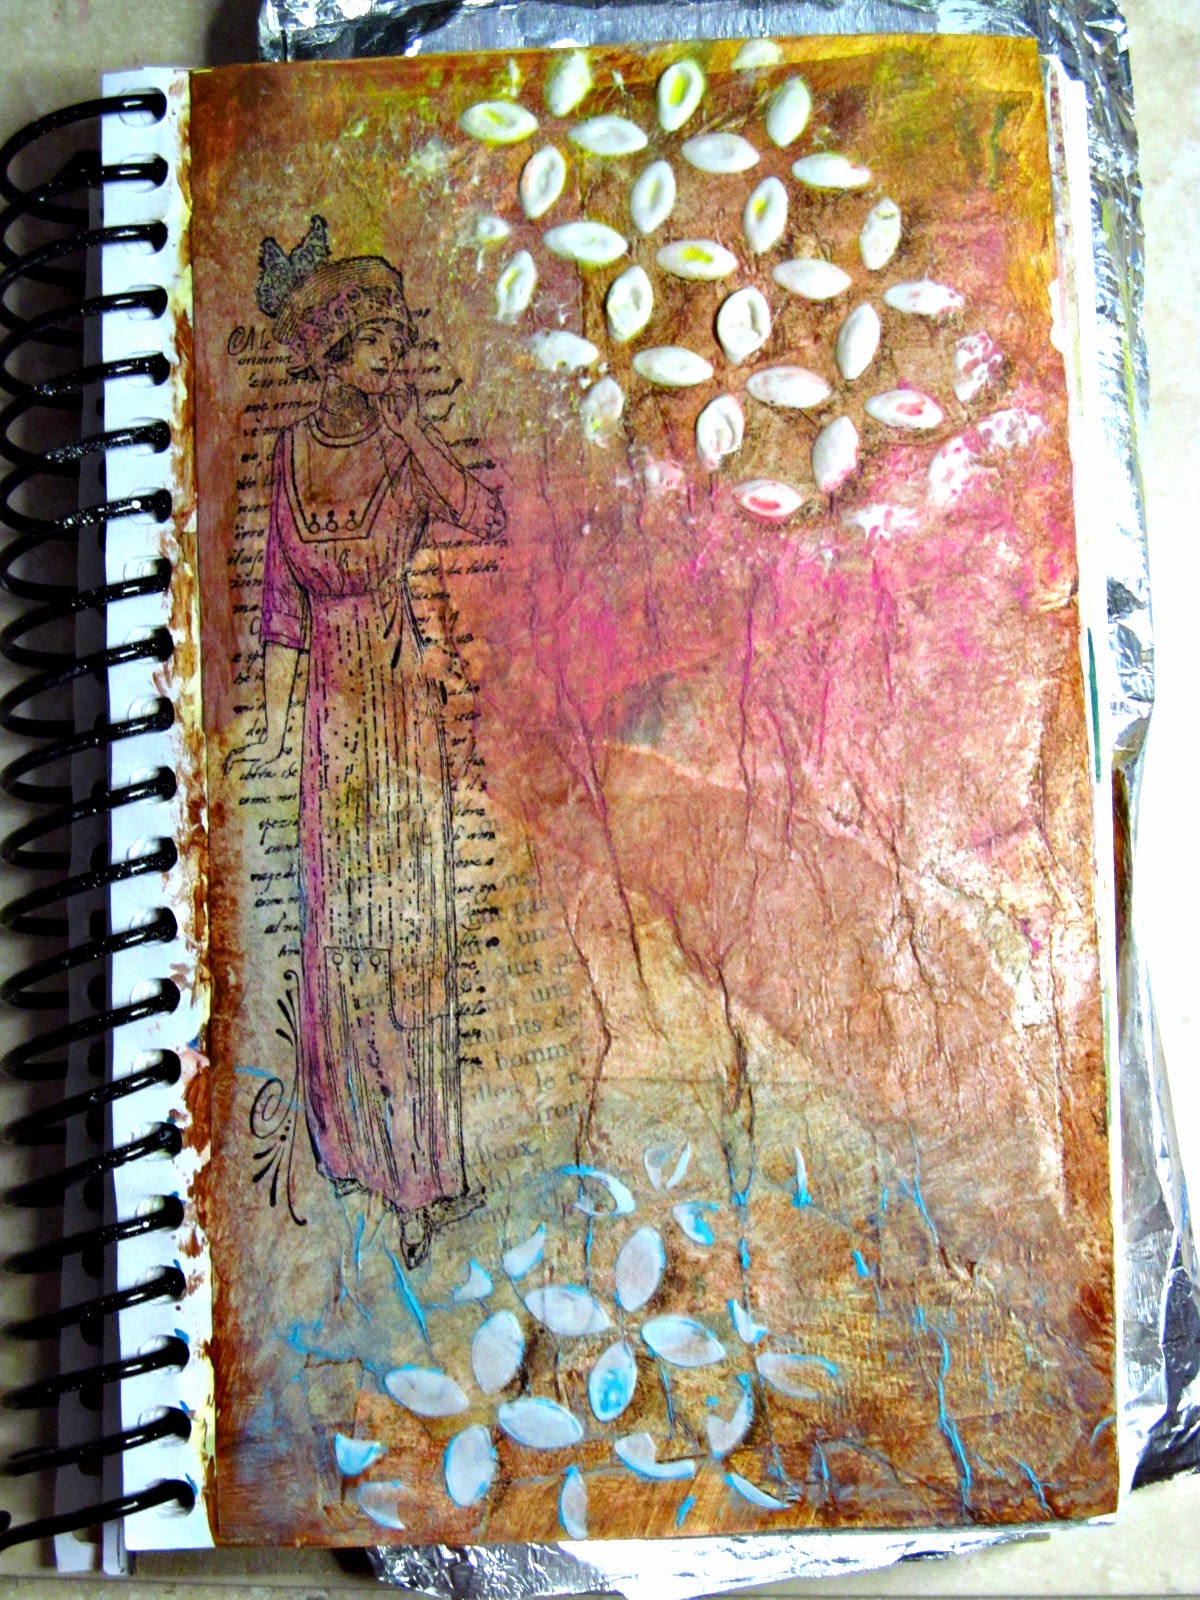
This was a page from my art journal. I have no clue what I was thinking as I started it in 2013. It was just brown. It appeared to be layers of papers and tissue papers and maybe some masking tape which then was covered with antiquing gel. Like I said, brown. Blah.
I first added some modeling paste using a stencil. After it dried I began coloring on Gelatos (using only the Tropical set of Snow Cone, Margarita Mix, Raspberry and Watermelon). You can color over the modeling paste, rub with your fingers to blend then lift the color from the paste using baby wipes. I stamped the woman from Hampton Art. The stamp set doesn't have a name on it but it is some sort of Paris fashion set. I then added detail color to her with the Gelatos using a tiny brush and a touch of water.
I knew it needed something so I walked away for a couple days.....so hard to do when you are dying to play with your new toys!

I came back when my full set of colors arrived. Look how rich these colors are!!!
I began adding more layers of color. Gorgeous rich Grape, luscious Lemon, rich Red Cherry, beautiful Spearmint. They brought the entire page to life.
I then added the stamping. I stamped the birds onto tissue paper then glued them down with Mod Podge. After that dried, I blended more Gelatos over the edges of the tissue to settle it into the page.
Lastly I stamped the sentiment. Both stamps are from Tim Holtz Lost and Found set.

If you look closely you can see the tissue paper with the birds but if you didn't know to look I doubt you would notice.
So, now I needed to make more!

I began this page using the drip technique. I found a great video on YouTube. How did we ever survive without YouTube???
The drips turned out great but were very pastel and so I had to walk away and decide what direction I really wanted to go.
I added some layers of acrylic and some papers. Still not happy. I added some stenciling. Getting better. I then added some gel medium via stenciling. Now this was getting fun.
Then came more Gelatos! I couldn't tell you exactly what colors I used. I do know that I used Snow Cone (the turquoise you see in the bottom left. It is also the bottom layer in the upper left which then had yellow applied over top to create that lovely spring green. The purple is either Grape or Raspberry and believe it or not I did not use any red to create that fabulous orange. It was all yellows and varying shades of pinks. I buffed some of the color off the gel medium circles using a baby wipe and then used Prismacolor pencils to make drop shadows. I blended them slightly with a blending stump.
I am not sure if this is done yet or not. I am really loving how it looks right now so I want to hold off for a while.
And now for a product I knew existed but never thought I would be interested in.....Gelli Plates.
You know something? Pinterest is costing me a fortune! LOL I saw some cool art journal pages on Pinterest and the artist had used Gelli prints as their backgrounds which of course sent me off investigating. I knew mono printing and I had heard of Gelli Plates but had not really LOOKED at them. Big mistake. Now I own the 3x5, the 5x7 and the 8x10 is supposed to be delivered on Tuesday. (oh yeah, did I ever tell you that I cannot buy just one of something? lol)
I began by playing with the 3x5. My thought process was.....it will take less paint so less waste as I figure this out AND I literally have 100s of blank 4x6 index cards. I think there are 6 unopened packages of them on the shelf (see, can't buy just 1).

My very first Gelli print. Well actually this was the ghost print after my first gel print. I found a cool resist technique online using gel medium. I used Gelatos as my color over the top.
This was a stencil of various sized circles. I thought it was cool how it ended up with what looks like bubbles with reflections so I immediately thought....Fish.
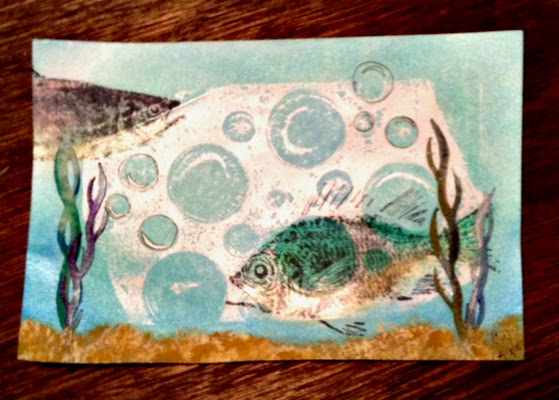
Sorry, not a great quality photo (I took it with my ipad).
The fish are Fred B Mullett. Silver Salmon facing right. Menpachi facing left.
I rubbed on Gelatos to color the fish, added some seaweed cut on my Cricut Explore and pounced on some sand using acrylic paints.

Still more 3x5s. I created some tools by cutting up some craft foam with decorative scissors. I used one to create the squiggles on the 2 upper left prints.
I embossed some cardstock and then pressed the embossed sheet onto the plate to obtain the cool designs on the other prints.


And I did some experimenting with the 5x7.

Yesterday I was feeling a bit down, I sat at my desk, pulled out this print and was thinking I just wanted to splatter, layer and make a mess all over it to let out some of my frustration. And then throw it away. I didn't like the print anyway so it would be a good way to vent.
I grabbed the chicken wire stamp and stamped it in white pigment ink. Well duh. pigment ink is NEVER going to dry when stamped over acrylic paint so I had to either rub it off or heat emboss. I chose clear embossing powder so that it would remain white. I then stamped again in CTMH New England Ivy. I added the post mark in the upper left from Tim Holtz French Market set. I used StazOn jet black. It was odd, it did not want to stick and I had to stamp it a couple times before I got a print.
It still needed something and I still needed to work out some frustration so out came the Gelatos. I rubbed in some red, pink, turquoise and green. The more color I added the better I felt and the better I liked this print.
Now, instead of being my least favorite it is my most favorite. My next decision is "What do I do with it?" lol

Here is another 5x7. I almost forgot to take a pic again. As you can see I was already cutting before I remembered lol
I wanted to try combining my Cricut with my printing.

Because of the metallic gold, these were difficult to get a decent photo.

I love how they turned out. They will look great on a card or journal page. I love being able to combine lots of different art techniques and tools (and then I can justify owning all this stuff lol)
Sorry it has been so long since my last post and that this post is so long.
It has been a pretty rough past few weeks.
Our cat, Kitty, past away this past Thursday. He has been battling cancer since right before Thanksgiving. It has been very difficult to watch. Poor little guy wasted away from a healthy, feisty 12 pound boy to a frail little 8 pound baby in just a couple months.
But now the battle is over and he is at peace. The hard part is that we are now left trying to fill the void in our hearts.
