I think I am finally all caught up! All the Christmas cards and boxes were mailed (and received) before Christmas which is always a good thing.
I have completed all the January birthday cards which is really a shocker because I usually forget my nephew's birthday (which is tomorrow) and end up sending his card at least a week late. He should have received it earlier this week.
My best friend Helen's card is done but now I am making her a gift (a last minute decision) so she may not get hers on time but I think she will forgive me.
Here is a picture of my nephew's card.
What do you put on a card for a 25 year old? I put minions lol
The minion was an SVG that I downloaded years ago. I can't even figure out from where which is sad because it is a set of 3 and very well done. I will keep looking and will add a link if I can find the source.
The background was embossed with the Cuttlebug Happy Birthday folder.
So, are you asking yourself, how on earth is she keeping herself on track when she is normally very scatter brained this time of year?
Bullet Journaling!
I'm not sure how I missed the start of this trend (I think it started a few years ago) but it is blowing up big now. Planners and Bullet Journals are becoming a huge thing which is rather amazing considering how almost everything else in the world has moved to paperless online tech.
I think the average person is figuring out what all of us crafters have know all along.....you cannot beat the feel of paper in your hands, or gripping a pen or brush in your fingers. The thrill of that first stroke on the plain page.
Most craft stores have created entire planner/journal sections in their stores with large varieties of books, pens, stamps and stickers....and who could forget washi tape!
I started a practice journal in December just to see if 1. did I like the process? 2. would I keep at it or give up after a couple days?
Turns out I like it. And I keep at it. And it keeps me on track (go figure lol)
You can find thousands of videos on YouTube to give you ideas but the bottom line is it has to work for you. A regular planner didn't do that for me. It was too rigid with no creativity.
I love the fully decorated, super fancy bullet journals but I don't have time for that (I have a full time job and craft projects to make other than just creating a journal)
Here is the article that really explained bullet journaling for me and made me think I could do this and enjoy it.
My style is a happy medium. Functional, simple with a bit of creativity. It doesn't take me days to create a spread, usually around an hour or 2 and I can see what I need at a glance.
Want to see my journal?
This is my journal cover. Isn't it gorgeous? Do you need one this fancy? No! But for me, I did. This is important to me. I am trying to be more organized in how I do a lot of different things this year. Yes, I can use any notebook but I thought if it looks important and 'impressive' then I will feel like it is important to use it. Yeah, it is all a mental game inside my head but it works for me! lol
I purchased my journal at Oberon Designs. You might recall that I purchased a journal from them last spring that I use for sketching. I love their stuff!!!
You can find your own gorgeous leather journal here.
This is my 2018 cover page. I drew the twig wreath and then wrote in the center (and realized my handwriting is so atrocious that I needed to cover it up! lol)
Thank goodness for my Cricut Explore! I had it write up the sentiment, cut it out on a circle and cut another blue layer circle to go under it.
Very simple, very clean, actually legible lol
Here is my January cover. I am practicing my handwriting but seriously, it is really bad! So my Cricut rescued me again. It is off center because it is covering my horrible handwriting lol
I drew the snowman and snowflakes :-) My overall theme for January is basically winter (snow, cold).
This is one of my January weekly spreads. I free-handed all the boxes and 'attached' them with tape and push pins :-)
The baby polar bear is a stamp from Stampendous! I drew the his snowman companion.
As you can see, clean, simple with a tiny bit of "art".
I've started setting up my February pages. Here is my cover and that short, half-week at the beginning of the month.
I used stencils to create the boxes and little extras (arrows, diamonds, triangles)
I purchased my stencil set on ebay but you can find them all over the internet. Just search for journal stencils.
The tiny calendar you will see on all my spreads is a stamp set. I purchased it on Amazon.
I wanted to convey love without all the hearts and flowers.
They aren't perfect but I like them. They are colored with Inktense Pencils. The background has a blue tint. I used Pan Pastels rubbed onto the corners.
Did you know this year is the Year of the Dog? I don't think these guys did either from the looks on their faces lol
I drew all the large lanterns to use for my daily entries, To Do list and weekly quote. The tiny banners (created using stencils) at the top right are for tracking my food log and daily steps.
I printed the year of the dog image from the internet.
The confused dogs are from the Mini Cats and Dogs/Crazy Dogs set from Tim Holtz. They were colored with Prismacolor Pencils as were all the lanterns.
Here is my vacation tracker spread.
The left page is a packing list.
The right is a savings tracker. I need to save up some big bucks so I can buy my plane ticket!
Both of these pages were drawn free hand.
And lastly...
I needed something to hold all my goodies....stencils, stamps and pens.
This was a cosmetic bag I purchased from MyVinylDirect. I was going to make some as Christmas presents. I bought 2 to practice on. Finished one. Here is the other that was still sitting blank on the shelf.
Now it is the perfect journal supplies pouch! Cricut to the rescue again!!!
So now you are all caught up with what I've been up to!
I wish you all a fabulous 2018!
Thanks for stopping by and Happy Crafting!!!
Have you started your shopping yet? Or maybe the more important question is.....Have you started making your gifts yet???
My answer to both is yes. Although I haven't gotten much completed yet. I just don't know what to make or buy this year. I think lots of people will be getting gift cards in fancy holders lol
The last couple months have been sort of a blur. My mom got sick in late September and worrying and praying for her has taken up most of my mental space. She is doing really well and the doctors give us hope that there will be a full recovery. Praise God!
During these past months my muse kind of went into hiding which is fine because I wasn't up to listening to her anyway.
I did manage to make a few things (actually a lot more than I realized when I downloaded all the pics from my camera). I will only share the few I liked the best. (Just because you made stuff doesn't mean it was any good lol)
Here is the card I made for my sister in law. I used one of Anna Griffin's parchment layers for the background. I find working with the parchment to be very relaxing (which is what I have needed lately)
I used Print Then Cut on my Cricut Explore to make the bird on the branches.
Here is the Thanksgiving card I sent to my parents. Again, a parchment background. I just love the delicate, lacy look. The flower vines were cut with my Explore. The turkey was Print Then Cut. I find myself using PTC much more since I bought the Kodak Verite 6 Anna Griffin printer. It works great with my Explore and prints beautifully.
One more parchment based card. I told you I was enjoying it lol
The white lace snowflake border/edge is from Anna Griffins holiday edge dies. The Poinsettia, cut from Cricut glitter card stock, is from a seasonal set of Anna Griffin dies from 2016 and the pine boughs are from her Christmas Botanicals set. Also from 2016. All cut using the Cuttlebug.
I think this was the best Christmas card I made this year. (I forgot to photograph 90% of them so you will just have to take my word for it lol) It's elegant and yet very simple. I was tempted to keep it just so I could hang it on my own wall.
So, changing gears, this is glitter HTV on a black t-shirt. Isn't it adorable???
I joined a membership group called Makers Gonna Learn. This is one of the files we received in the first month. (I think there were 30 in all) You should really check it out. It is run by Tanner Bell. If you haven't seen him before check him out on YouTube. His enthusiasm is infectious.
You can check out the Makers Gonna Learn site here.
And lastly, the new Cricut Maker machine was launched this past summer. Did I need a new machine? No.....defintely No. I have the original Cricut, the Expression, the original Explore, and the Air 2. Why on earth would I need a 5th Cricut machine?
Well, it cuts fabric! And etches metal (I need to take pictures of the dog tags I've made) and they are making additional tools to use in it. It comes with a rotary cutting blade! How cool is that.
The giraffe above is about 14" tall, made of flannel with felt mane and tail and cut entirely by the Cricut Maker. Wow!
I really did say over and over that I did NOT need this machine. And then hubby and I watched the launch on HSN in October. HSN really is a dangerous place!!! But seeing it made me question my decision and surprisingly enough made hubby question it as well. He decided I DID need it and offered to split the cost with me. I was online ordering immediately lol
I have not used it a lot yet....but I have been pretty preoccupied lately. I am hoping after the holidays to really dive in and make some more projects. I have all the materials set aside to make a little fox doll wearing a vest. I think it will be super cute.
But until then I am happily praising God as he continues to heal and strengthen my mom and rejoice in the upcoming birthday of our Saviour.
Until next time, keep warm and Happy Crafting!
Hubby and I just celebrated our 15th anniversary. We always take a few days and head to the coast. It is a nice way to relax and so nice to get away but it also keeps me from creating much lol
I did manage to get my Mother's Day cards done before we left.
My camera is having issues. Every picture has a yellow cast. I keep messing with the settings and it makes no difference. This card is actually blue (not aqua lol) and the interior layer is white.
The fancy lace edge is a cutting die from Crafter's Companion called Sophia. Isn't it gorgeous?! It was another one of those March 8 craft day purchases. I told you I bought WAY MORE than I usually do! lol
The lace corner comes from the Vintage Wedding Cricut image set. I have no idea if that is a cartridge or just a set in Design Space as I had never heard of it before. The actual image is a round lace doily that I sliced down to just a corner piece.
The flowers are also from Cricut and is called 3D Cactus Flower.
"Happy Mother's Day" was cut with my Cuttlebug. "Happy" came from the Crafter's Companion die set call 'Let's Party'. I liked the smaller size. This set is actually designed to go with the Diamond Press cut/emboss machine but the dies work great in the Cuttlebug too.
"Mother's Day" comes from Anna's 'Wishful Thinking' set. It also has a 'happy' die but it is much larger and took up too much space. I love how all these word dies from CC and AG can be mixed together!
This card just kept growing lol
I started with Anna's Flower Bramble cutting die in pink on top of the cream card base.
I then cut the image for the sentiment (and it's dark pink layer) from the Fantastic Flips Cricut cartridge. I stamped the sentiment using Anna Griffin's flip card stamp sentiments set.
I needed more so I used Print Then Cut on the Cricut Explore and cut the roses which are on the Fantastic Flips extra content cartridge.
I needed even more so I added the lavender layer under the Flower Bramble.
Ugh! I felt it still needed MORE lol So I dug through the cutting die drawer (yes, I have a drawer and it is over flowing - even after moving a ton of dies into magnetic storage binders lol)
I cut the cream, rounded edge lace using a die from the Eleanor Laces set.
You know I don't normally have this many layers on a card but I think I was channeling Anna Griffin lol
I like how it turned out so I guess Anna didn't steer me wrong. :-)
And lastly...
Hubby's niece announced this week that she is engaged. I thought that deserved a card. :-)
The fancy edge is from Anna Griffin's edge die set. These dies cut so beautifully!
I then added a cream strip topped with a vellum embossed layer using the border from the Bit of Paisley embossing folder set.
The roses and sentiment were embellishments from one of the AG flip card sets.
Here is a close-up of the embossed vellum. It looks a lot like lace when you emboss it.
Helpful tip: put a piece of card stock under the vellum in the embossing folder. It keeps the vellum from tearing AND you also get an embossed layer to use in a later project.
Here is a picture from our anniversary trip. It was close to sunset on a cloudy day. This is the Coquille River lighthouse in Bandon, Oregon.
It no longer contains a light but is still a beautiful building. It is often open for tours and you can climb up into the light tower.
I hope you all have a beautiful week and lots of crafting time!
Happy Crafting!!!
Last weekend was Presidents Day and I took an extra day off so that I could have a 4 day weekend to just play around. I thought the project I chose would be easily completed during my days alone (Monday and Tuesday). Boy was I wrong! lol
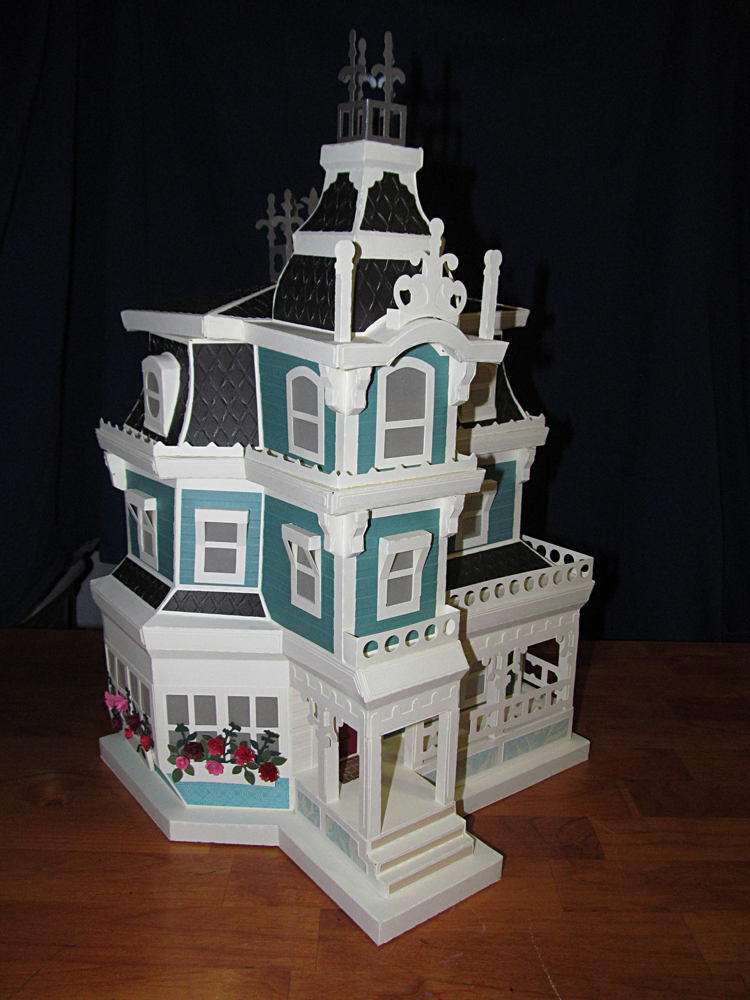
I decided to make SVG Cuts' Magnolia Manor. Have you seen it? It is a GORGEOUS Victorian mansion. You need to check it out.
The first issue with building any of these 3D projects is picking the right papers. I originally was going to make the house dark red (I even made a special trip to Michaels to buy the paper). I now have several sheets of dark red card stock waiting for something else lol
I ended up using card stock from Close To My Heart. Lagoon, Colonial White, and Black. The 'wrought iron' decorations on the top are Cricut's Pearl paper. I am not sure what they call the color but I would call it Pewter.
I embossed all the siding to look like clapboard using Cuttlebug's Stripes folder. I embossed a diamond pattern on all the roof pieces with CTMH's Diamond folder.
As fabulous as it is I thought it needed 'something' so I created window boxes on the bay window.
I cut strips of the Colonial White to simulate the actual box, folded the ends to give the illusion that they really are boxes then filled them with leaves and flowers.
The taller green plants are from Spellbinders Die D-Lites Basil set. The smaller leaves and all the flowers come from Impression Obsession die sets. The leaves are the Small Leaf Cluster set, the flowers are the Spiral Flower set.
Yesterday I made a trip to the craft store just to buy lights for my house. I used Firefly LED lights (a string of 30). I am thinking maybe I need to switch to a string of 10 or 15 but doesn't it look cool all lit up?
All the prior houses I have made from SVG Cuts took just a couple afternoons to complete. This one was much more than that.
It took over 3 1/2 hours just to cut out all the layers! I was able to call my mom and have a long chat AND then cook dinner while I moved mats in and out of my Explore!
Then over the next 4 days I spent aproximately 14 - 15 hours assembling. I then spent an additional hour or so creating the window boxes.
Was it worth all that time? YES!!!
Would I do it again? Maybe, but it would probably be as a gift because I don't really need 2 of these houses sitting around.....unless I decided to make one for Halloween or Christmas. I can see this as a really cool haunted house. ;-)
But I did more than just build a house this week.
My brother's birthday was on the 23rd. And I actually made his card BEFORE his birthday! lol
Now, I didn't mail it until the 21st so it probably didn't arrive in time but at least I was closer than I was with my niece and nephew lol
This is one of Tim Holtz' Crazy Dogs. The food dish comes with the dog set. The party hat and balloons are from the Crazy Things set.
I stamped and masked the hat, dish and dog using my Misti. I then colored everything with Spectrum Noir markers.
I cut the frame with my Cricut Explore. It is from the Pooh and Friends cartridge. I used Distress Inks around the edges.
The balloons are attached with foam tape and the strings are heavy carpet thread. I cut a small slit around the dogs foot so that he could hold the strings.
My Tim Holtz Birch Trees cutting die arrived on Friday so of course I had to try it out. And then I had to figure out something to use it on. Oh the troubles of a crafter lol
I used Distress Inks on the trees.
I then embossed light blue card stock with Crafters Companion Regency Swirls embossing folder. The blue is a white core card stock so I rubbed the embossing with sandpaper to make the swirls white.
A while back, one of the local craft stores had the Gorjuss stamps on sale for 1/2 off. I picked up a few because I think they are so adorable.
I finally found time (and a project) to try one out.
This girl (and her squirrel) are from the You Brought Me Love set.
They are stamped with Distress Ink Black Soot and colored with Spectrum Noir alcohol markers.
I then fussy cut them and attached them with foam tape.
I had so much fun coloring the first Gorjuss girl that I decided to color another one. :-)
She comes from a set called The Hatter.
She is also stamped with Black Soot and colored with Spectrum Noir markers.
Notice the cool corners? That was an estate sale find from yesterday.
The listing had all kinds of things....collectibles, books, kitchen stuff, old toys and the last thing....craft stuff.
So we stopped by, it was the last day of the sale so you know all the good stuff is long gone but they usually mark stuff way down to try to unload it.
The sign said anything priced under $50 was 75% off.
I wandered all over the entire house twice. Lots of tacky junk and piles of trash but no treasures.
On my third pass I noticed a couple tattered boxes filled with what looked like old, ratty magazines. I never go through stuff like that, I have enough trash in my own house! lol But this voice in my head said....what the heck, shuffle through and see.
I found the corner stamp, it is Martha Stewart. I also found a Martha Stewart butterfly border punch. These things are not cheap when brand new. I was happy.
So I moved to the second box of junk. I shuffled through several tattered magazines and as I picked them up a Cuttlebug folder fell out of the stack...still in it's original packaging. Huh! What do you know! So I shuffled a little more intently and found 5 more Cuttlebug folders, Cuttlebug plates - 1 A, 2 B and 1 C ....all still in the factory packages, never opened. I left 2 of the Cuttlebug folders - 1 I already owned, the other just didn't appeal to me.
For the 2 punches, 4 folders and 4 plates and a Tupperware mixer/shaker (so I don't just buy craft stuff lol) I paid $6.50 I couldn't buy 1 Cuttlebug folder for that amount! I had just been thinking the day before that I needed to get some new B plates as mine are in really rough shape!
Yep, estate sales are fun!
So that wraps up all my finds and creations for this week.
I hope you all have a wonderful week as we move into March! (can you believe it???)
Happy Crafting!
Yeah, so better late than never. HaHa
I have no idea where the time goes. Just yesterday it was Halloween and here we are through the holidays and more than half way through January 2017!
But we did have a wonderful, relaxing Christmas.
I cannot honestly say what I made over the past couple months. I know I made more Christmas cards. I am pretty sure I did not remember to photograph them lol
Here is a project I made just a few days before Christmas.
I found this 14 x 14 shiplap sign at a local craft store. It had a thin white wash on it.
I base coated it with cream colored acrylic paint and then applied vinyl lettering.
I then painted the entire thing black.
Next came a vinyl manger followed by a coat of dark red.
I then peeled up all the vinyl to reveal the prior colors.
The red had bled a bit under the manger vinyl so I dry brushed a bit more over the black to make it look like that is what I intended all along :-)
I wanted to stencil a star but the vinyl wouldn't stick to the red paint so I cut a star from glitter card stock and glued it on.
I love how it turned out! I picked up another sign at the same time which is about 12 x 24. I need to get working on it so I can hang it in the same spot.
That finished up 2016.
So let's start 2017!
My best friend (and collage roommate) Cathy...I call her Helen (long story lol) has a birthday this month. Of course I made her a card!
This is the Pansies box card from the Springtime box cards set at SVG Cuts. I love how it looks just like a basket full of pansies sitting on my desk. I think she is going to love it.
And of course I made her a little something to go with it.
I have a big box full of mint tins. I stared into that empty tin for over a week trying to decide what to put inside.
I finally decided on 'mermaid'. But what exactly should be going on?
I searched through the Cricut image library for mermaids. I found several. Once I had chosen a few that fit beautifully into my tin I needed to decide what kind of scene she would be living in (which would help me pick which mermaid to use)
I thought of sunken ship and this mermaid seemed to be looking at something so she was chosen.
I googled images of sunken ships until I found one I liked that would look good cropped into the lid. I then searched for an under water scene to fill the bottom of my box.
I used the Cricut Explore Print Then Cut feature to get my backgrounds cut to the correct size.
The mermaid is from the Cricut image set "Mermaid Party". Her tail is cut from Cricut glitter card stock, Her top is cut from Cricut Pearl paper. Both of these papers cut beautifully even at such a tiny size. (the mermaid is only about 3" tall)
All the plant life was also cut with my Explore. I really pushed the intricate cuts to the limit on this project and the Explore still performed beyond belief.
My only problem was her eyes and mouth. They are sooooo small. The Cricut cut them but being so teeny I couldn't handle them and found it easier to paint them on instead of making a gluey mess.
The final touch was to glue the plants into a gravel/sand base so that it created a 3D scene.
I fell in love with it and kept asking hubby if it would be horrible of me to keep it lol
So, because it is just wrong to keep the gift you made for someone else (or so hubby kept insisting), I made another one.
Same backgrounds and plants but instead of a fushia and lavender brunette mermaid I maid a copper and dark red blonde mermaid. She also has a couple sea shells on her ocean floor.
Now I had a bigger dilemma.....I loved BOTH of them. How on earth do I decide which one to send?
I won't tell you which one I kept (because I just mailed it today and in case she reads this blog I want her to at least have a little surprise lol) But the decision came down to this.....one box opens easily, the other kept sealing itself shut! Ha!
Thanks for stopping by!
I wish you all a year full of peace, love, health, happiness and lots of crafting time!
You ever think ... "Oh, I really should go and do...?" And then you keep putting it off and putting it off until it really becomes embarrassing? Yeah, that is me and my blog.
I went through a crafting slump and wasn't doing much (I'm still not doing a whole lot) and I would think, 'I have nothing to blog about" so I stayed away.
I don't have much to share but it is ridiculous to stay away!
Like I said, I haven't really done much. I have a few journal pages (but nothing worth sharing)
But I have created lots of cards!
Let's start with a project I did last night. A Taco Pop-Up gift card holder. :-)
Have a family member who loves Mexican food? Want to give them a gift card with style?
Well here you go! Who wouldn't love a taco with money stashed in the meat? lol
I think I will add a dollop of 'sour cream' so I can add a sentiment. :-)
If you would like to create one yourself you can find the Cricut Explore file here.
Like I said earlier, I have made A LOT of cards. I won't bore you with pictures of them all but I will share a couple of my favorites.
I created this fun card for my niece. She turned, um.... well I think she turned 20 this year. I am so bad with keeping track of their ages (because the older they get means I am getting older too and I don't want to think about that!)
I had so much fun making this card. The mirror was done on my Minc so that it really is shiny and reflective. The girl's dress was also run through the Minc and the pattern is purple foil but it doesn't show in the photo. My niece loved it. :-)
So, last year, my brother in law made the comment that everyone gets cool cards except him. Since no one had ever told me his birth date it made it a little difficult to know when to send him a card. Well, I made up for it this year.
He is an avid hunter so I went wild with the hunting theme.
This box card includes a duck, a pair of geese, a bear, a deer, a deer head mounted on the wall, a stump to sit on to rest and a hunter. I embossed wood grain on the sides of the box for even more outdoorsiness (yep I am making up words here! lol)
According to my sister, he totally loved everything about it! Whew!
And lastly, I have to always be learning something new or I feel like my brain is going stagnant.
So, I am teaching myself cookie decorating.
I tried doing the flooded icing techniques....I need A LOT more practice!!!
I was getting a bit frustrated so I changed gears and tried something more in my wheelhouse.
Painted cookies!
Now I still have to flood the icing base (and am still not good at it) but then I get to go wild with paint (food colors).
Of course my first subject was Tucker. He always was and always will be my favorite model. (I still miss him) I like the back view cookie better than his face cookie but they both tasted yummy. :-)
In case you forgot what he looked like. I miss that little face!!!
And then I created a Wookie cookie.
My sister named her cat Wookie. I have no idea why. She doesn't look like that big, hairy Star Wars beast. Although my sis says she can be a holy terror lol
Here is what Wookie looks like for real (my sister has her shaved every year because I guess Wookie is not into grooming and keeping all those tangles at bay). This was taken the day she got shaved. She looks so sad.
Isn't she cute? I cannot believe she ever does anything wrong with that sweet little face. :-)
The pic I used was last year's shaved pic and she looks more angry than sad lol
I hope I haven't bored you too much. Hopefully it won't be another 8 months before I blog again. :-)
I know, I have not posted in a while. My excuse....um, sorry, don't have one. lol
So, I thought I would pop in and share a little of what I have been doing lately.
In my last post I shared some of my favorite cards from the first 30 days of the Index Card a Day challenge over at Daisy Yellow.
I am proud to say that I completed the 61 day challenge. I did not skip a day and I ended on time. Now, I won't say that every card I created was a work of art. Some of them are pretty bad lol But I created a card EVERY day and that is the challenge. I also stayed on prompt for every card. Yep, I am very proud of myself....and feeling a bit lost without the daily challenge.
So here are some of my favorites from July.
The prompts from left to right:
Top Row: Queen of Hearts, Chess, Face, Flag
Middle Row: Definition, Parachute
Bottom Row: Bridge or Gin Rummy, Raindrops, Weather
I found myself drawing more in those 2 months then I had in years....and loving it! I also had strange and unexpected side effect. I became hooked on Chibis. Yes, those cute little childlike Japanese anime characters.
Someone in the group posted a card one day stating she had bought her daughter a learn to draw chibis book and decided to try it herself. Her little people were adorable and made me want to try it too.
I ordered a couple books from Amazon (How To Draw Manga Chibis & Cute Critters by Samantha Whitten and Jeannie Lee and Manga For the Beginner, Chibis by Christopher Hart)
I am having so much fun! My kitten from the Raindrops card was my first attempt at an animal chibi. I love how he turned out.
I am finding that I am better at drawing the faces than I am at bodies and clothing....but I am loving the learning process so I draw at bit a few days a week. I think I am getting better....not sure how hubby feels since I keep bugging him with 'how does this look?' haha
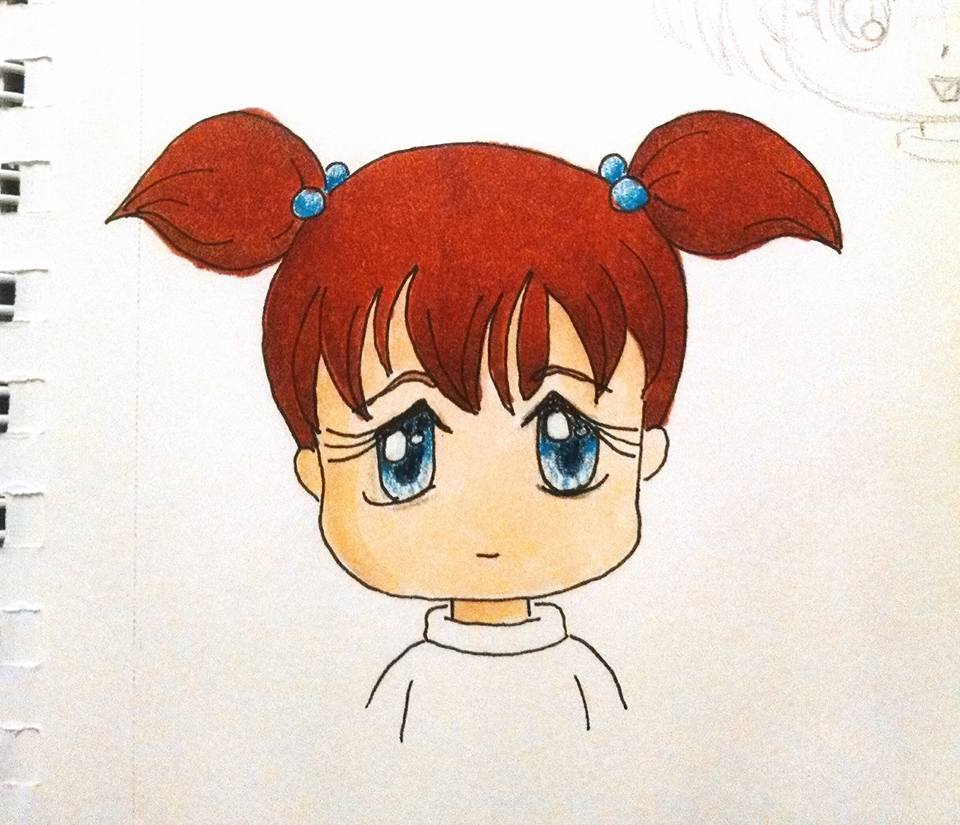
So, here she is, my very first chibi. Her face is cute and done fairly well. Her body and clothes...well there are issues lol I drew her on July 17.
Red Riding Hood. Again, I really like the face but the hands, legs and feet are too teeny/scrawny. Drawn on July 19.
Now we jump ahead a couple weeks. I was stuck in bed with severe back spasms so I had hubby bring me my sketch pad, pencils and markers. I decided to concentrate on faces and hair for the day. I wanted to create expressive faces and cute hair. July 31
Moving forward to today, August 7. I have been wanting, since day 1, to create the cast of the Wizard of Oz. I may have jumped the gun but I am having a good time and learning as I go.
Here is the pen drawing.
I have started adding color. I am using Copic markers. Now if you have read my blog over the past few years then you are probably shocked. I swore I would never jump on the Copic bandwagon! Who in their right mind spends $6+ on a single marker? Well, obviously, now I do. I found that for the first time in my life I could not get the look I wanted with pencils (and I am really good with pencils - if I do say so myself lol)
So each payday I head to the local craft store and pick up a couple. Not a huge hit to my budget and I slowly increase my stash. Tomorrow I need to pick up a couple for this piece as all I currently have are flesh and hair colors. Dorothy said she does NOT want a peach or brown colored dress!
But fear not, I have not totally abandoned my Explore lol
My nephew's birthday is next week so I created this fun box card for him from the Summer Box Cards set at SVGCuts.com
I used my Minc to create the gold foil stars. I love how the Minc can give any project a little extra 'pop'.
Well that's all for now.
Stay cool in this summer heat and if you are on the west coast of the USA, try to stay smoke free. The fires are really bad this year and the air quality is becoming very hazardous.
Until next time. Happy Crafting!