Showing posts with label Gelatos. Show all posts

Friday, March 09, 2018

Buzz Buzz Buzz


I woke up bright and early at 6:30 am on a Saturday. It was not entirely my idea, the cats were demanding breakfast. But that’s ok, I had been trying to find time to get back to my Dina Wakely Media journal.

I knew I wanted to work on the kraft paper and bees kept coming to mind.

I put down a layer of color using Gelatos (Butter Cream, Kiwi, and Aqua Dolce) and Scribble Sticks (Tangerine, Ruby, and Night) I blended these with a Gelatos blending stump.

I then stamped a honeycomb design randomly over the page using KaiserCraft’s Honeycomb clear stamp and Distress Ink, Walnut Stain.  I thought I took pictures of just the background with the stamps but I can't find them in my files. :-(

My next step was to spray a layer of Krylon’s Workable Fixatif. My hope was that this would keep the Distress Ink and Gelatos from fading away when I added my layer of gel medium. (it worked pretty well, I had very minimal bleed/fade in the Distress Ink and no noticeable color change in the Gelatos)


I applied Golden’s Gel Medium (soft gel, semi gloss) with a palette knife and set it aside to dry. It can take several hours for the gel to dry completely. Let it set and dry on it’s own and it dries clear. Dry it with a heat tool and it dries with a milky cast.


Once the gel medium was dry, I rubbed on some Snow Cone and Watermelon Gelatos on top. I then brushed these places with water to make the color move down between the gel medium hexagons. I then, while still wet, wiped the excess color off the gel medium areas.
You can see the base colors and stamped lines under the clear hexagons.


I applied some more gel medium ‘honeycombs’ to capture a bit of these new colors. The gel is partially dry in the picture below.


I drew the queen with Prismacolor pencils (Dark Brown, Peach, Light Peach, Black, White, Tuscan Red and Violet) the highlight in her eye is white acrylic paint. Her hair is a mixture of Prismacolor pencils (Black and Dark Brown) and Scribble Sticks (Black and Lemon). Her crown is Scribble Sticks (Lemon, Tangerine and Black). I ended up going back over her crown with Prismacolor pencils (Black, Canary Yellow and Spanish Orange) to make is show up a bit more. I colored in between the gel hexagons that overlap her face, with black Prismacolor, to make them stand out.


I found a photo of a honey bee online. I resized it and added 3 of them to my page. The largest is about ¾ of an inch. I then colored the edges with Dark Brown Prismacolor to tone down the brightness of the body and the whiteness of the wings.


I am debating back and forth as to whether it is finished. Part of me wants text or scribbles along the left side. Part of me says don’t mess this up lol


Thanks for stopping by!

**Update


I added bits of text using Distress Ink, Walnut Stain and a rubber stamp from Non Sequitur from a stamp plate that I bought maybe 20 years ago. If you have a choice, always by red rubber stamps! They will last a life time!!! 

As always...Happy Crafting!


Sunday, March 29, 2015

So many projects.....so little time

I was in such an art/craft funk right after Christmas. I had no ideas and no desire to do anything.

Thankfully I found Gelatos and Gelli Plates.....and my Bad Babies!

These things have kept me sane and jump started my creativity again  :-)

The Bad Babies are really swapping up a storm right now!
Last week I shared my Arch shaped ATCs.

This week I joined a Postcard swap. We have to art up three 4x6 postcards and our theme is 'collage'. My mind was immediately full of ideas!  I created this first card within 24 hours of signing up. It was just screaming to get out of my head. lol


About 3 or 4 years ago I found an old photo album at an estate sale. It was full of pictures...family pictures, baby pictures, family vacations, new homes, new cars, camping trips... I asked the seller (an estate sale company was handling the sale) why the family didn't want it. He said had asked the same thing and none of the remaining family had any idea who these people were. How sad is that? So I scarfed it up for I think around $4 for about 100 photos (the album was a mess so I trashed it). When a project moves me I scan one of the pictures and give these people a new life. This happy couple looked like they had a story to tell (there were several pictures of them in the album).

I folded the photo, sanded the folds and then rubbed on some Distress Ink - Old Paper to give it some 'age'.

A month ago I was at another estate sale and found a box full of postage stamps from around the world and a stamp collecting album. We are talking thousands of stamps dating clear back to the 20s and 30s up through around the 70s or 80s. It is a huge collection. I picked it up for $5. I was excited about the stamps, I use them all the time in projects. What thrilled me even more were the packets of letters I found in the bottom of the box when I got home. Letters from the 40's and mostly from WWII. An air force man name Bob stationed in Great Britain writing home to his family. I have not had a chance to read them yet but this letter jumped out at me with the heading My dearest 'Polly'. I scanned and printed the letter (which appears to be written on a vellum paper) and I decided this woman in the photo is Polly standing happily beside her Bob.

I saturated the letter with water then dripped on some Walnut Stain.

The British stamps are also from this bundle, the Love stamp is from my prior stash.

I wanted this card to feel like these items were maybe all stashed away in a drawer together.

 
A few days later I created postcard number 2. I went in a totally different direction for this one.


I applied gesso to my card then painted the background with Gelatos.
I stamped the woman (Stonehouse Stamps) and colored her with watercolor pencils.
I dug through my stash of Japanese paper scraps and found this gorgeous paper that matched my background colors beautifully. I cut it into strips and used Mod Podge to glue it down creating a magical tree line. Lastly I used torn pieces from a Chinese newspaper I picked up in San Francisco on a vacation in 2007 (it was thankfully a huge Sunday edition and will last me many more years lol) I wanted the newspaper to create the illusion of ground.
Finally I added the Chinese lantern stamp.

I have until June 15 to get my third card done. I don't think I will need that long. :-)


And of course I had to pull out a Gelli Plate this week.

I own 3 plates...the 3x5, the 5x7 and the 8x10.
I finally opened up the 8x10 and gave it a try.

Let me start with....I love my Gelli Plates. I have so much fun combining color and get a thrill with how unexpected each print is.
This was my first time using the 8x10 and although I love the results I think the 5x7 is my favorite and this is why....
My art desk, although quite large (about 10x30), holds a lot of items like my computer/monitor, 2 Cricut machines, several cups full of pens and pencils, towers of stamping inks, stacks of art journals, a land line Mickey phone and a box of tissues. My actual work space ranges from 36x20 to 24x20 depending on how clean my space is at the time lol
To use the 8x10 I had to move out to the dining room table which means finding newspaper to cover it, hauling out all my supplies and battling Minnie who claimed the table as her domain years ago.
I spent more time is set up, tear down and moving a cat out of the way than I did printing.
Although I liked the results I think I will reserve this plate for when I know that I need a large project and stick with my 5x7 that I can use on my art desk.

But, here is what I did (well part of it)
I tried fabric printing for the first time. I had a project in mind so I needed to print up the fabrics.


I have no idea why the background fabric looks pink, I was using muslin...and I photoshopped the crap out of this picture and still can't get the muslin to look off-white. Oh well lol

I used a pink paint for the base print and then a turquoise and green blend for the top print. I then stamped the fish (Fred B Mullett's Big Pompano) in white paint. Obviously I had issues lining up my prints lol


Here I printed a turquoise layer first and then a lilac layer on top. I stamped the fish with black paint (Fred B Mullett's Menpachi and Silver Salmon) and again color issues, the black looks almost red. No clue what was up with my camera lol

And my last fabric print of the day


Just one layer of blue and yellow (which created some green areas when brayered). I used embossed papers and scoring tools to create the patterns.

Now onto the project I envisioned before I printed.


Let me start with.....I NEVER carry a purse! Can't stand them. When I was growing up I watched my Mom haul around this huge purse and my dad and all of us kids would constantly be either asking for something from it or asking her to carry something in it for us as we did not want the burden of carrying it ourselves. I swore I would never have that happen to me.

However, when I go on vacation I like to have my camera with me and a place to carry small treasures I might pick up.
This little tote is 8 inches wide and about 9 inches tall. It has an over the shoulder/cross body strap so my hands stay free. It easily holds my camera, a package of tissues (darn allergies) and will have room for postcards, ephemera or other small goodies I might find.

I used the other fish print for my back fabric. I heat set both panels with an iron so it won't be fading anytime soon.

Now I just need a vacation!  :-)

Happy Crafting and have a wonderful week.


Sunday, March 22, 2015

Sometimes I surprise myself

It seems like it has been ages since I have been here but it really was just a month ago. (which is much longer than I like but...)

I felt like I just hadn't done anything so why bother dropping in and yet when I downloaded the pictures from my camera (I take pics as I work and/or complete things) I found 38 photos! Don't worry, I am not going to post ALL of them on here.....just a lot of them lol

I have been all over the place with my projects these past weeks. Partially due to new supplies (Gelli Plates and Gelatos) and partially due to missing Kitty and stress from work. I don't seem to stay very focused but obviously I was more focused than I realized HaHa

I am still in LOVE with Gelatos! How can you not be in love with paints that give you such rich and luscious color?

Here is a journal page that I have been working on when ever the mood strikes. I don't know if it is done yet but I love how it looks.


I have not Photoshopped this picture. The colors really are that rich and vibrant! And they blend so easily with just your finger and a dab of water!


I love this stamp. He comes from Abracadabra. It is hard to tell but I rubbed a little color under him as a shadow. I ended up rubbing on a bit more after the photo but was too lazy to grab my camera again. Shame on me.


I am having a blast experimenting with Gel Medium as well. This photo depicts the upper right corner, the upper left and the bottom right.
In the upper right I stamped first then applied the Gel Medium so it looks like you are looking through bubbles at the stamp image. The upper left I used the lighter blues and teals then added the gel and went over it with pinks and darker blues so the lighter colors show in the squares. I did the same on the bottom right with greens and yellows and then orange over top. I love seeing the bottom layers of color through the gel shapes.

But fear not, I have not abandoned my Explore lol


Our anniversary is coming up and I wanted a cool card for Hubby.
This comes from the SVG Cuts Hearts Aflame set.
Isn't that matchbook just the cutest?!
I used the Heartstrings paper pack from Close To My Heart. Everything but the yellows came from that set. Such gorgeous papers. I had purchased 2 packs and they are now gone and I am wishing I had bought more!

Here is what I made with the rest of the papers.


It is a Waterfall Folio. I plan on using it as a mini scrapbook for our mini getaway. I usually do some sort of scrapbook for our anniversary trips but since last years book is only about half done I figured I better set up something super easy to do for this year (having 2 books going is not something I want to deal with lol)

You can watch the tutorial for the folio here. They are super easy and make great gifts.


And of course, I am still using my Gelli Plates at least a couple times a week. I find it to be very relaxing after a stressful day at work.
I will not bore you with pictures of the tons of prints I have made. You're welcome. LOL

But I wanted to share a before picture with you.

I printed a couple tags.

Now obviously I knew you could print on tags. You can print on pretty much anything you want lol  But I wanted to see if I would like printed tags and if they would inspire me to make anything with them.

I have to say, the springtime ideas are flying around my head already for the green one and I know the red one will become some fabulous project for fall or Halloween.

Stay tuned for after pictures....eventually.  :-)

And lastly.....yeah yeah I am finally getting toward the end. :-)

I joined a swap. I haven't swapped with any groups in a long time. The last few times were not good experiences and resulted in me spending lots of time creating wonderful projects just to have the people I was swapping with keep my stuff and never send anything back. It made me swear I would never swap again.

BUT the BadBabies are back and swapping again! I am so excited! I have missed those people!!!

I signed up for an Arched ATC swap. All the cards have to be Arch shaped. Now being the bad baby that I am I took some leeway with the 'arch' shape lol

I had to make 6 cards, I ended up making 7 because I decided to keep one of them lol

 
I used a Gelli print for the interior of her head. See, I actually use my prints. :-)


Ha! Look at that! Another Gelli print! AND the houses are masks I used in one of my prints. I liked how they turned out better than I liked the print lol

 
Back to my roots....Asian stamping. I love this stamp, she comes from Stamp Magick. The kanji says Health.

 
This dragonfly is from UpTown Stamps. The lettering is from the CTMH Curlicue Alphabet D1630. The background is colored with Gelatos.


And looky there! Another Gelli print. I cut it into strips to make the nest. The bird is from the Cricut Winter Frolic cartridge. I cut him in white cardstock and then painted him.

All the 'arch' shapes were cut with my Explore from various cartridges.

And lastly, #7, the one I decided to keep.


Minnie is from the Nifty Fifties cart. I cut her in black and then painted on her white features. The Explore actually cut the eyes! I am still amazed at how intricate this thing can cut. Those eyes are less than a 1/16" of an inch tall!
The pillow is from Create a Critter.
She is decked out with rhinestones on her crown and collar. :-)

She thinks she is so regal.


This is the picture I put on the back of the ATC with the caption "As we see her". 
My crazy girl! :-)

Well, that wraps it up for this post. If you made it this far...Thank you!

And if you didn't well then I guess you missed out lol

Wishing everyone a wonderful week and Happy Spring!!!


Sunday, February 22, 2015

Gelli & Gelatos

I am the first to admit that I don't usually jump on the latest art and crafting trends....although I do usually know about them. But this past week I heard about a product that I had never seen before and yet, from what I have gathered, it has been around for a little while.

Gelatos! Have you seen these things? If you love color (and who doesn't????) You are going to want these!

They are luscious, vibrant watercolors in wonderful little lipstick tubes.
They are smooth and creamy and blend easily with your fingers or you can add water and get the full watercolor effect. I fell in love just looking at them online! You can read all about them here. I ordered the full set of 28 colors from Amazon. But couldn't wait for them to come so I ran to the local art store (literally just 2 blocks away lol) and bought the Tropical set (which is not part of the full 28 set)

I could not wait to play!!!

My first foray into Gelato land is not my best work BUT I loved how the Gelatos performed.


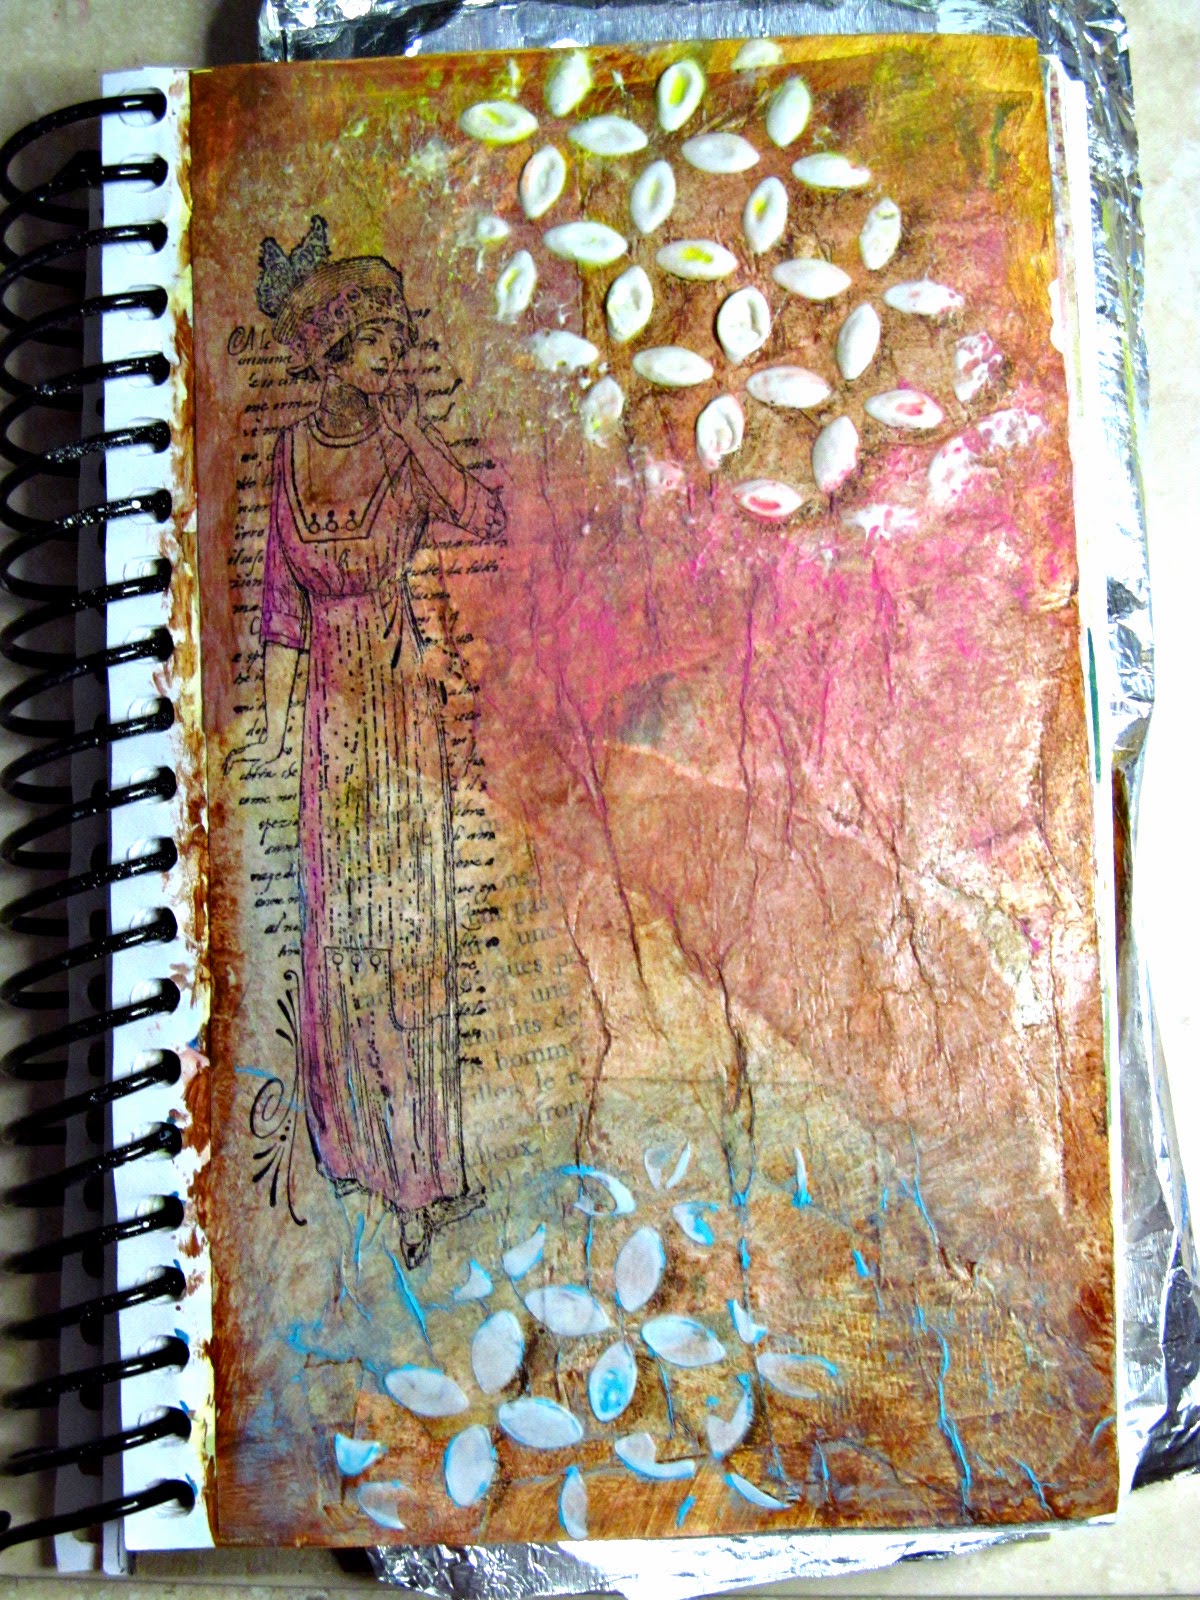
This was a page from my art journal. I have no clue what I was thinking as I started it in 2013. It was just brown. It appeared to be layers of papers and tissue papers and maybe some masking tape which then was covered with antiquing gel. Like I said, brown. Blah.

I first added some modeling paste using a stencil. After it dried I began coloring on Gelatos (using only the Tropical set of Snow Cone, Margarita Mix, Raspberry and Watermelon). You can color over the modeling paste, rub with your fingers to blend then lift the color from the paste using baby wipes. I stamped the woman from Hampton Art. The stamp set doesn't have a name on it but it is some sort of Paris fashion set. I then added detail color to her with the Gelatos using a tiny brush and a touch of water.

I knew it needed something so I walked away for a couple days.....so hard to do when you are dying to play with your new toys!


I came back when my full set of colors arrived. Look how rich these colors are!!!
I began adding more layers of color. Gorgeous rich Grape, luscious Lemon, rich Red Cherry, beautiful Spearmint. They brought the entire page to life.

I then added the stamping. I stamped the birds onto tissue paper then glued them down with Mod Podge. After that dried, I blended more Gelatos over the edges of the tissue to settle it into the page.
Lastly I stamped the sentiment. Both stamps are from Tim Holtz Lost and Found set.


If you look closely you can see the tissue paper with the birds but if you didn't know to look I doubt you would notice.

So, now I needed to make more!


I began this page using the drip technique. I found a great video on YouTube. How did we ever survive without YouTube???
The drips turned out great but were very pastel and so I had to walk away and decide what direction I really wanted to go.
I added some layers of acrylic and some papers. Still not happy. I added some stenciling. Getting better. I then added some gel medium via stenciling. Now this was getting fun.

Then came more Gelatos! I couldn't tell you exactly what colors I used. I do know that I used Snow Cone (the turquoise you see in the bottom left. It is also the bottom layer in the upper left which then had yellow applied over top to create that lovely spring green. The purple is either Grape or Raspberry and believe it or not I did not use any red to create that fabulous orange. It was all yellows and varying shades of pinks. I buffed some of the color off the gel medium circles using a baby wipe and then used Prismacolor pencils to make drop shadows. I blended them slightly with a blending stump.
I am not sure if this is done yet or not. I am really loving how it looks right now so I want to hold off for a while.

And now for a product I knew existed but never thought I would be interested in.....Gelli Plates.

You know something? Pinterest is costing me a fortune! LOL  I saw some cool art journal pages on Pinterest and the artist had used Gelli prints as their backgrounds which of course sent me off investigating. I knew mono printing and I had heard of Gelli Plates but had not really LOOKED at them. Big mistake. Now I own the 3x5, the 5x7 and the 8x10 is supposed to be delivered on Tuesday. (oh yeah, did I ever tell you that I cannot buy just one of something? lol)

I began by playing with the 3x5. My thought process was.....it will take less paint so less waste as I figure this out AND I literally have 100s of blank 4x6 index cards. I think there are 6 unopened packages of them on the shelf (see, can't buy just 1).


My very first Gelli print. Well actually this was the ghost print after my first gel print. I found a cool resist technique online using gel medium. I used Gelatos as my color over the top.
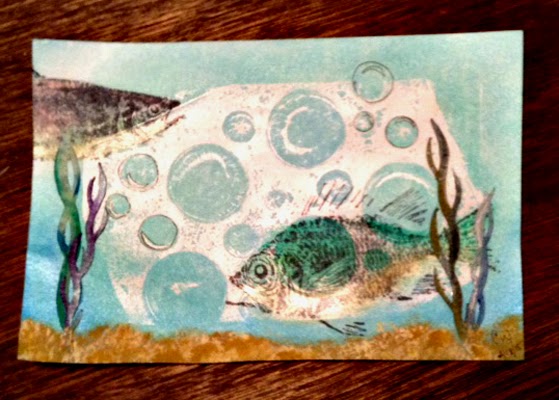
This was a stencil of various sized circles. I thought it was cool how it ended up with what looks like bubbles with reflections so I immediately thought....Fish.


Sorry, not a great quality photo (I took it with my ipad).
The fish are Fred B Mullett. Silver Salmon facing right. Menpachi facing left.
I rubbed on Gelatos to color the fish, added some seaweed cut on my Cricut Explore and pounced on some sand using acrylic paints.


Still more 3x5s. I created some tools by cutting up some craft foam with decorative scissors. I used one to create the squiggles on the 2 upper left prints.
I embossed some cardstock and then pressed the embossed sheet onto the plate to obtain the cool designs on the other prints.

I love this. Very basic yet very vibrant.

The colors got muddy in the middle but you can see all the clockworks from the embossed sheet.


And I did some experimenting with the 5x7.

I forgot to take a picture of this one before I began embellishing. It was pretty blah and I set it aside thinking it really needed 'something'.

Yesterday I was feeling a bit down, I sat at my desk, pulled out this print and was thinking I just wanted to splatter, layer and make a mess all over it to let out some of my frustration. And then throw it away. I didn't like the print anyway so it would be a good way to vent.

I grabbed the chicken wire stamp and stamped it in white pigment ink. Well duh. pigment ink is NEVER going to dry when stamped over acrylic paint so I had to either rub it off or heat emboss. I chose clear embossing powder so that it would remain white. I then stamped again in CTMH New England Ivy. I added the post mark in the upper left from Tim Holtz French Market set. I used StazOn jet black. It was odd, it did not want to stick and I had to stamp it a couple times before I got a print.

It still needed something and I still needed to work out some frustration so out came the Gelatos. I rubbed in some red, pink, turquoise and green. The more color I added the better I felt and the better I liked this print.

Now, instead of being my least favorite it is my most favorite. My next decision is "What do I do with it?" lol


Here is another 5x7. I almost forgot to take a pic again. As you can see I was already cutting before I remembered lol

I wanted to try combining my Cricut with my printing.


Because of the metallic gold, these were difficult to get a decent photo.


I love how they turned out. They will look great on a card or journal page. I love being able to combine lots of different art techniques and tools (and then I can justify owning all this stuff lol)

Sorry it has been so long since my last post and that this post is so long.

It has been a pretty rough past few weeks.
Our cat, Kitty, past away this past Thursday. He has been battling cancer since right before Thanksgiving. It has been very difficult to watch. Poor little guy wasted away from a healthy, feisty 12 pound boy to a frail little 8 pound baby in just a couple months.

But now the battle is over and he is at peace. The hard part is that we are now left trying to fill the void in our hearts.