Sunday, May 31, 2015

Loving this beautiful weather!

The rain has finally stopped and we have had a full week of sunshine and warmth. Most people would head outside for picnics, camping, hiking. Not me. I head out to the garage to refinish furniture lol

Last weekend (Memorial Day weekend) was gorgeous. The rain had stopped, the sun was sort of peeking out and the temperatures peaked in the mid 70s. My husband was looking forward to a weekend in front of the television and playing on his computer. Yeah, I didn't let that happen lol

I have been wanting to get rid of the dresser I have been using...it was a hand me down from my inlaws...a bland/blah thing from the 80s. No character and definitely not 'Me'. It clashed with all the antique and vintage style furniture in the room. So I convinced hubby that it was time to refinish the old dresser he had stashed out in the garage.

We estimate, based on wood type and construction, that it is from the 1940s. It was originally stained but at some point in it's life someone spray painted it black and added some hideous gold drawer pulls.


I had already removed some of the pulls before I remembered to take a picture.  Poor thing, it was in pretty rough shape and yet still very structurally sound.....and weighs a tons! lol

I primed it and then painted on several coats of Behr's Cottontail latex paint. I let it dry overnight then hit is with a sander (and a bit of hand sanding) to bring back that aged (and well loved) look.

I then hit all the home improvement stores to find the perfect pulls and fell in love with some that have a dark bronze base and porcelain looking inlay.


The fronts of the drawers have a swirled texture in the wood. I didn't know how this would look when I distressed the paint but I tried to use a light hand and I am thrilled with the results.  And I just LOVE the new pulls!  :-)


It now has a whole new life and although hubby was not happy about losing his weekend, we are both very happy with the results.

But of course, that is not the only thing I have been up to  :-)

My postcard swap items are due in mid June. I completed 2 of the 3 a while ago (see prior posting) and have been stuck with trying to come up with something for number 3.

I finally went digging in my old photo stash.


I found this girl proudly showing off her dress. It isn't a really fancy dress but she seems very happy so I wanted to send her to a dance. I went searching online and found this ticket to a prom "Under the Big Top". Yep, I could see her wearing that dress to a circus themed prom.  I added one of her old hair ribbons and the chorus to one of the songs they played that night.  :-)

Here is the complete set I am sending for the postcard swap.


And lastly, I got a new toy a couple weeks ago. I have a love/hate relationship with the HSN craft days. I see so many things that are new and interesting and thankfully I can usually resist (or only make a small purchase). But I knew this item was coming and I was positive that I didn't need it...and then I watched them demo it and I HAD to have it.

Anna Griffin's mini Minc machine

Have you seen this thing? It is a foil laminator and was just too cool for me to pass up. It had a premier price of only $69, much less than I have paid for other machines in my craft room heehee. (I used it in the prom postcard in case you didn't notice lol)

To be able to add foil accents to projects is just too cool. And I wanted to be able to combine it with other items in my craft room.


Experiment #1: stamp rubber stamp images, scan them then use my Explore to Print Then Cut them.
Then add foil to create fancy card embellishments.


Voila!  How cool would that look on a birthday card?  A shiny light pink and gold cupcake?!  Love it!

Experiment #2: scan images out of my Dover clip art books (I have a couple dozen of them lol) and then print and foil.


The cat is from a clip art book. the flower background is one of the pre-printed backgrounds that came with the Minc. (it came with over 150 printed items including backgrounds, sayings and images....an awesome collection)

The foiled the cat with gold and the flowers with teal. What is really a very simple and basic card has now become elegant. Love it!!!

I am having way too much fun!  I foiled the text for my nephew's graduation card....but haven't photographed it yet (have to remember to do that).

And I made this card for my mom just so she can see exactly what I keep babbling about every time I call her lol


The bad thing about foil is that it is very difficult to photograph!
The background is another of the pre-printed, Anna Griffin backgrounds foiled in silver. The Hello is one of the pre-printed sayings foiled in rose-gold. The bouquet is a Print Then Cut from my Explore.

Well, that's all for this week. I hope you are all having beautiful weather and get to enjoy it in any way that makes you happy.




Sunday, May 10, 2015

Happy Mother's Day!

To all you wonderful moms out there I hope your children shower you with love today.

I have been absent for a few weeks. Work has been such a bear that I run screaming from my desk each day and don't want to go near another one until I am forced out of bed the next morning. But projects and deadlines exist and I did manage to get a few things completed since I was last here.

The Bad Babies are trying out Pocket Letters. It seems to be the latest craze and we thought we would give it a go. If you haven't heard of them just hit up Google or Pinterest...there are tons of videos and blogs about them.

You would think that filling 9 slots with ATCs and ephemera would be easy....or at least I did. It was much tougher than I expected. I had ideas on what I wanted to do. I even made lists of things I could put in each pocket....and then I got stuck.

How do I decorate each pocket?
Should I have a theme for the whole thing?
Should I try to stick to a color palette?
I know nothing about my recipient...what if she hates everything I put in it?

What I thought would be a 2-3 day project took me almost a month (remember I also had that work issue making me dread any desk in my house lol)

Here is my final Pocket Letter.


I didn't know if she preferred brights or pastels so the corners are bright and the rest are pastels with the middle possibly going either way lol
The top, center pocket has a packet of flower seeds.
The center pocket with the typewriter has my letter.
Of course the Tea Time has the required tea bag (I hate tea and have no idea why that is a 'rule' for these but whatever)
The bottom right is a collage of postage stamps and the pocket is jammed full of stamps from all over the world.
 
I used vinyl on a couple pockets to hint what was inside.
 
 
This pocket is full of stamped quotes. Great for adding to projects.


Here is a stack of Gelli Print backgrounds cut down to 2 1/2 x 3 1/2 for ATCs.

I also created some ATCs myself.
 
 
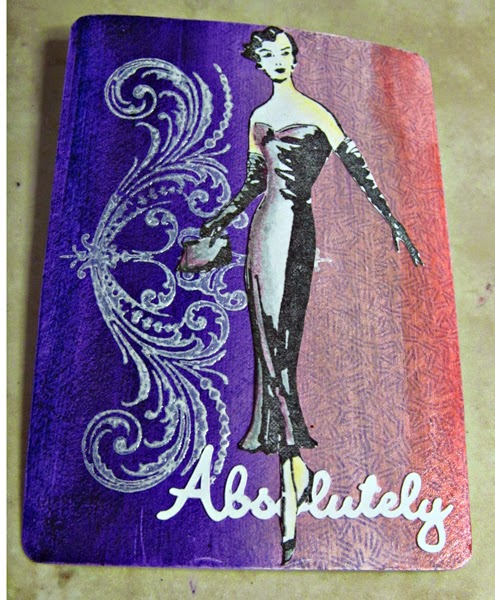
I honestly cannot remember what I tucked behind this 'Absolutely' card. Isn't that sad?! I mailed this out several weeks ago and my brain is mush these days....obviously lol.
 
The background colors are Gelatos. The woman is a stamp from Art Impressions (L-3103) The flourish is from Tim Holtz French Market set.


One of the ATCs had die-cuts behind it. It think it is this "trendy" one since she is a cut from the Cricut cart Forever Young. The background is a gelli print.

So that went out the door and I was on to the next project(s)...


I have probably mentioned this before over the years, my parents birthdays, Mother's day and Father's day all fall within a one month period. That keeps me hopping for several weeks as I try to get everything made, purchased, packed and mailed.


I made the SVG Cuts Peony Cottage for my Mom. I hope she likes it. I think it is adorable!


For my Dad, I made this cute Smores box from the SVG Cuts Camp Firefly set. It is just big enough to tuck a gift card inside.


My Mom loves tote bags. She says she has tons of them. She rarely buys them. She gets them free when stores are giving them away as promotions or she gets them as gifts from us kids.

I was in the middle of this project when my mom told me she had received an early Mother's Day gift from one of my sisters.....a large tote made from recycled sails. Mom was very excited about it. I am not upset but I was a bit bummed....I was making my mom a large tote from some Gelli Prints I created just for this project. :-(

So, I had to step back for a couple days and rethink. I ended up changing the project a bit. I went from large tote to not quite as large purse/tote with a shoulder strap and magnetic clasp.

The above picture is the front stamped with Fred B. Mullett stamps Lil Ox Eye Oreo, Seahorse 2 and Big Pompano.

And a note about Fred B. Mullett....I bought some stamps directly from his website. The customer service I received blew me away! I received a personal email thanking me for my order and a request that I let them know when it arrived and that he would look into possibly cutting the shipping cost on my order. A couple days later I received a reduction on my shipping! I emailed them back upon receipt of my stamps (which was much sooner than I had expected!) and received another personal and humorous email in return again thanking me for my purchase and wishing me years of enjoyment with my new stamps. No one does that anymore. Everything is automated replies. This was such a breath of fresh air. If I was not already a huge fan of his stamps I certainly would be now. So, if you cannot find his stamps in your local stores don't hesitate to order from him directly. You will not be disappointed.

And back to my Mom's tote/purse ...


Here is the back. This is stamped with a small school of the Lil Ox Eye Oreos, a Rockfish and Silver Salmon.

But since I was now making a purse instead of a tote I added a couple more goodies inside.


A pouch for tissues and a zipper pouch (I do not have a lot of experience installing zippers so hopefully Mom doesn't inspect too closely lol)

And of course, cards...


I love this hummingbird from Art Nouveau.


And my Dad's birthday card which comes from Wild Card 2.


This purse comes from SVG Cuts Luxury Handbag kit. I took the gift card panel from gift card holder in the set and added it to the Gal Pal card so that it is now a gift card holder and a flip open card. That probably doesn't make much sense but if you view the set it might lol


I think that covers everything....you should all know by now that you are in for a picture heavy post if I haven't been around for a few weeks lol

Thank you all for visiting and Happy Mother's Day!


Sunday, March 29, 2015

So many projects.....so little time

I was in such an art/craft funk right after Christmas. I had no ideas and no desire to do anything.

Thankfully I found Gelatos and Gelli Plates.....and my Bad Babies!

These things have kept me sane and jump started my creativity again  :-)

The Bad Babies are really swapping up a storm right now!
Last week I shared my Arch shaped ATCs.

This week I joined a Postcard swap. We have to art up three 4x6 postcards and our theme is 'collage'. My mind was immediately full of ideas!  I created this first card within 24 hours of signing up. It was just screaming to get out of my head. lol


About 3 or 4 years ago I found an old photo album at an estate sale. It was full of pictures...family pictures, baby pictures, family vacations, new homes, new cars, camping trips... I asked the seller (an estate sale company was handling the sale) why the family didn't want it. He said had asked the same thing and none of the remaining family had any idea who these people were. How sad is that? So I scarfed it up for I think around $4 for about 100 photos (the album was a mess so I trashed it). When a project moves me I scan one of the pictures and give these people a new life. This happy couple looked like they had a story to tell (there were several pictures of them in the album).

I folded the photo, sanded the folds and then rubbed on some Distress Ink - Old Paper to give it some 'age'.

A month ago I was at another estate sale and found a box full of postage stamps from around the world and a stamp collecting album. We are talking thousands of stamps dating clear back to the 20s and 30s up through around the 70s or 80s. It is a huge collection. I picked it up for $5. I was excited about the stamps, I use them all the time in projects. What thrilled me even more were the packets of letters I found in the bottom of the box when I got home. Letters from the 40's and mostly from WWII. An air force man name Bob stationed in Great Britain writing home to his family. I have not had a chance to read them yet but this letter jumped out at me with the heading My dearest 'Polly'. I scanned and printed the letter (which appears to be written on a vellum paper) and I decided this woman in the photo is Polly standing happily beside her Bob.

I saturated the letter with water then dripped on some Walnut Stain.

The British stamps are also from this bundle, the Love stamp is from my prior stash.

I wanted this card to feel like these items were maybe all stashed away in a drawer together.

 
A few days later I created postcard number 2. I went in a totally different direction for this one.


I applied gesso to my card then painted the background with Gelatos.
I stamped the woman (Stonehouse Stamps) and colored her with watercolor pencils.
I dug through my stash of Japanese paper scraps and found this gorgeous paper that matched my background colors beautifully. I cut it into strips and used Mod Podge to glue it down creating a magical tree line. Lastly I used torn pieces from a Chinese newspaper I picked up in San Francisco on a vacation in 2007 (it was thankfully a huge Sunday edition and will last me many more years lol) I wanted the newspaper to create the illusion of ground.
Finally I added the Chinese lantern stamp.

I have until June 15 to get my third card done. I don't think I will need that long. :-)


And of course I had to pull out a Gelli Plate this week.

I own 3 plates...the 3x5, the 5x7 and the 8x10.
I finally opened up the 8x10 and gave it a try.

Let me start with....I love my Gelli Plates. I have so much fun combining color and get a thrill with how unexpected each print is.
This was my first time using the 8x10 and although I love the results I think the 5x7 is my favorite and this is why....
My art desk, although quite large (about 10x30), holds a lot of items like my computer/monitor, 2 Cricut machines, several cups full of pens and pencils, towers of stamping inks, stacks of art journals, a land line Mickey phone and a box of tissues. My actual work space ranges from 36x20 to 24x20 depending on how clean my space is at the time lol
To use the 8x10 I had to move out to the dining room table which means finding newspaper to cover it, hauling out all my supplies and battling Minnie who claimed the table as her domain years ago.
I spent more time is set up, tear down and moving a cat out of the way than I did printing.
Although I liked the results I think I will reserve this plate for when I know that I need a large project and stick with my 5x7 that I can use on my art desk.

But, here is what I did (well part of it)
I tried fabric printing for the first time. I had a project in mind so I needed to print up the fabrics.


I have no idea why the background fabric looks pink, I was using muslin...and I photoshopped the crap out of this picture and still can't get the muslin to look off-white. Oh well lol

I used a pink paint for the base print and then a turquoise and green blend for the top print. I then stamped the fish (Fred B Mullett's Big Pompano) in white paint. Obviously I had issues lining up my prints lol


Here I printed a turquoise layer first and then a lilac layer on top. I stamped the fish with black paint (Fred B Mullett's Menpachi and Silver Salmon) and again color issues, the black looks almost red. No clue what was up with my camera lol

And my last fabric print of the day


Just one layer of blue and yellow (which created some green areas when brayered). I used embossed papers and scoring tools to create the patterns.

Now onto the project I envisioned before I printed.


Let me start with.....I NEVER carry a purse! Can't stand them. When I was growing up I watched my Mom haul around this huge purse and my dad and all of us kids would constantly be either asking for something from it or asking her to carry something in it for us as we did not want the burden of carrying it ourselves. I swore I would never have that happen to me.

However, when I go on vacation I like to have my camera with me and a place to carry small treasures I might pick up.
This little tote is 8 inches wide and about 9 inches tall. It has an over the shoulder/cross body strap so my hands stay free. It easily holds my camera, a package of tissues (darn allergies) and will have room for postcards, ephemera or other small goodies I might find.

I used the other fish print for my back fabric. I heat set both panels with an iron so it won't be fading anytime soon.

Now I just need a vacation!  :-)

Happy Crafting and have a wonderful week.


Sunday, March 22, 2015

Sometimes I surprise myself

It seems like it has been ages since I have been here but it really was just a month ago. (which is much longer than I like but...)

I felt like I just hadn't done anything so why bother dropping in and yet when I downloaded the pictures from my camera (I take pics as I work and/or complete things) I found 38 photos! Don't worry, I am not going to post ALL of them on here.....just a lot of them lol

I have been all over the place with my projects these past weeks. Partially due to new supplies (Gelli Plates and Gelatos) and partially due to missing Kitty and stress from work. I don't seem to stay very focused but obviously I was more focused than I realized HaHa

I am still in LOVE with Gelatos! How can you not be in love with paints that give you such rich and luscious color?

Here is a journal page that I have been working on when ever the mood strikes. I don't know if it is done yet but I love how it looks.


I have not Photoshopped this picture. The colors really are that rich and vibrant! And they blend so easily with just your finger and a dab of water!


I love this stamp. He comes from Abracadabra. It is hard to tell but I rubbed a little color under him as a shadow. I ended up rubbing on a bit more after the photo but was too lazy to grab my camera again. Shame on me.


I am having a blast experimenting with Gel Medium as well. This photo depicts the upper right corner, the upper left and the bottom right.
In the upper right I stamped first then applied the Gel Medium so it looks like you are looking through bubbles at the stamp image. The upper left I used the lighter blues and teals then added the gel and went over it with pinks and darker blues so the lighter colors show in the squares. I did the same on the bottom right with greens and yellows and then orange over top. I love seeing the bottom layers of color through the gel shapes.

But fear not, I have not abandoned my Explore lol


Our anniversary is coming up and I wanted a cool card for Hubby.
This comes from the SVG Cuts Hearts Aflame set.
Isn't that matchbook just the cutest?!
I used the Heartstrings paper pack from Close To My Heart. Everything but the yellows came from that set. Such gorgeous papers. I had purchased 2 packs and they are now gone and I am wishing I had bought more!

Here is what I made with the rest of the papers.


It is a Waterfall Folio. I plan on using it as a mini scrapbook for our mini getaway. I usually do some sort of scrapbook for our anniversary trips but since last years book is only about half done I figured I better set up something super easy to do for this year (having 2 books going is not something I want to deal with lol)

You can watch the tutorial for the folio here. They are super easy and make great gifts.


And of course, I am still using my Gelli Plates at least a couple times a week. I find it to be very relaxing after a stressful day at work.
I will not bore you with pictures of the tons of prints I have made. You're welcome. LOL

But I wanted to share a before picture with you.

I printed a couple tags.

Now obviously I knew you could print on tags. You can print on pretty much anything you want lol  But I wanted to see if I would like printed tags and if they would inspire me to make anything with them.

I have to say, the springtime ideas are flying around my head already for the green one and I know the red one will become some fabulous project for fall or Halloween.

Stay tuned for after pictures....eventually.  :-)

And lastly.....yeah yeah I am finally getting toward the end. :-)

I joined a swap. I haven't swapped with any groups in a long time. The last few times were not good experiences and resulted in me spending lots of time creating wonderful projects just to have the people I was swapping with keep my stuff and never send anything back. It made me swear I would never swap again.

BUT the BadBabies are back and swapping again! I am so excited! I have missed those people!!!

I signed up for an Arched ATC swap. All the cards have to be Arch shaped. Now being the bad baby that I am I took some leeway with the 'arch' shape lol

I had to make 6 cards, I ended up making 7 because I decided to keep one of them lol

 
I used a Gelli print for the interior of her head. See, I actually use my prints. :-)


Ha! Look at that! Another Gelli print! AND the houses are masks I used in one of my prints. I liked how they turned out better than I liked the print lol

 
Back to my roots....Asian stamping. I love this stamp, she comes from Stamp Magick. The kanji says Health.

 
This dragonfly is from UpTown Stamps. The lettering is from the CTMH Curlicue Alphabet D1630. The background is colored with Gelatos.


And looky there! Another Gelli print. I cut it into strips to make the nest. The bird is from the Cricut Winter Frolic cartridge. I cut him in white cardstock and then painted him.

All the 'arch' shapes were cut with my Explore from various cartridges.

And lastly, #7, the one I decided to keep.


Minnie is from the Nifty Fifties cart. I cut her in black and then painted on her white features. The Explore actually cut the eyes! I am still amazed at how intricate this thing can cut. Those eyes are less than a 1/16" of an inch tall!
The pillow is from Create a Critter.
She is decked out with rhinestones on her crown and collar. :-)

She thinks she is so regal.


This is the picture I put on the back of the ATC with the caption "As we see her". 
My crazy girl! :-)

Well, that wraps it up for this post. If you made it this far...Thank you!

And if you didn't well then I guess you missed out lol

Wishing everyone a wonderful week and Happy Spring!!!


Sunday, February 22, 2015

Gelli & Gelatos

I am the first to admit that I don't usually jump on the latest art and crafting trends....although I do usually know about them. But this past week I heard about a product that I had never seen before and yet, from what I have gathered, it has been around for a little while.

Gelatos! Have you seen these things? If you love color (and who doesn't????) You are going to want these!

They are luscious, vibrant watercolors in wonderful little lipstick tubes.
They are smooth and creamy and blend easily with your fingers or you can add water and get the full watercolor effect. I fell in love just looking at them online! You can read all about them here. I ordered the full set of 28 colors from Amazon. But couldn't wait for them to come so I ran to the local art store (literally just 2 blocks away lol) and bought the Tropical set (which is not part of the full 28 set)

I could not wait to play!!!

My first foray into Gelato land is not my best work BUT I loved how the Gelatos performed.


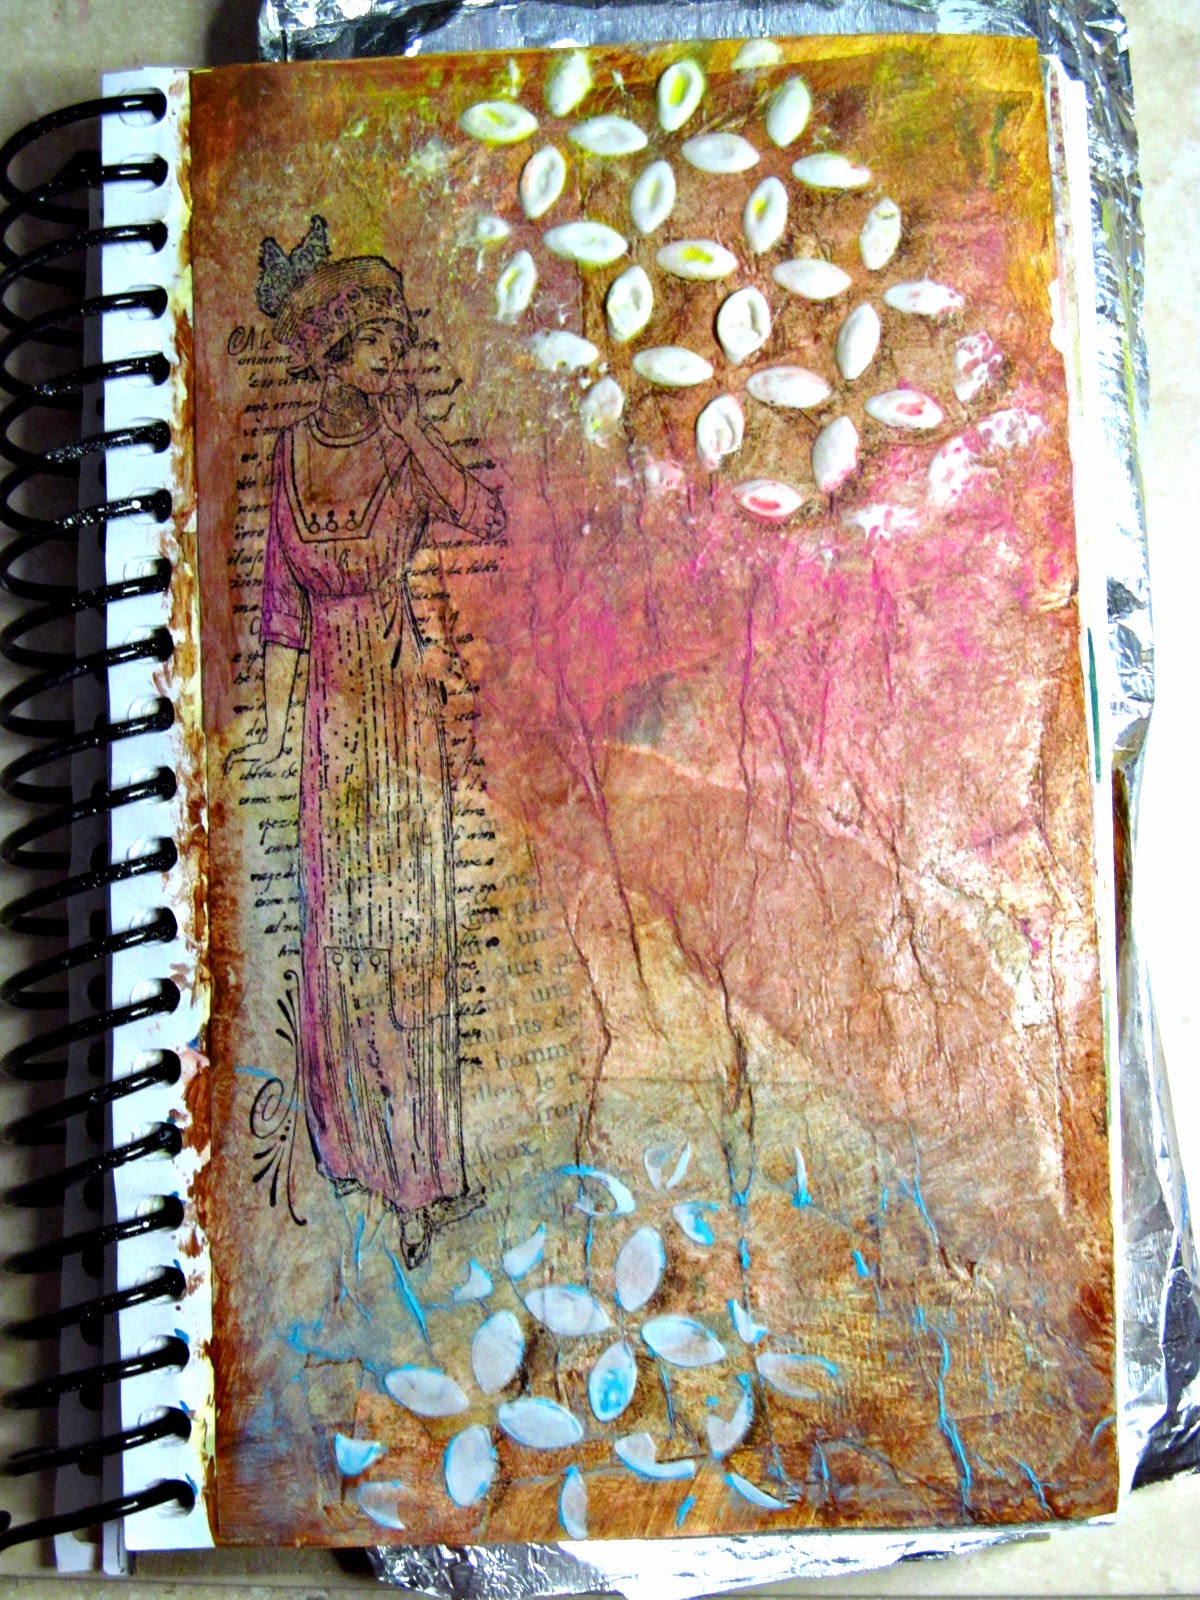
This was a page from my art journal. I have no clue what I was thinking as I started it in 2013. It was just brown. It appeared to be layers of papers and tissue papers and maybe some masking tape which then was covered with antiquing gel. Like I said, brown. Blah.

I first added some modeling paste using a stencil. After it dried I began coloring on Gelatos (using only the Tropical set of Snow Cone, Margarita Mix, Raspberry and Watermelon). You can color over the modeling paste, rub with your fingers to blend then lift the color from the paste using baby wipes. I stamped the woman from Hampton Art. The stamp set doesn't have a name on it but it is some sort of Paris fashion set. I then added detail color to her with the Gelatos using a tiny brush and a touch of water.

I knew it needed something so I walked away for a couple days.....so hard to do when you are dying to play with your new toys!


I came back when my full set of colors arrived. Look how rich these colors are!!!
I began adding more layers of color. Gorgeous rich Grape, luscious Lemon, rich Red Cherry, beautiful Spearmint. They brought the entire page to life.

I then added the stamping. I stamped the birds onto tissue paper then glued them down with Mod Podge. After that dried, I blended more Gelatos over the edges of the tissue to settle it into the page.
Lastly I stamped the sentiment. Both stamps are from Tim Holtz Lost and Found set.


If you look closely you can see the tissue paper with the birds but if you didn't know to look I doubt you would notice.

So, now I needed to make more!


I began this page using the drip technique. I found a great video on YouTube. How did we ever survive without YouTube???
The drips turned out great but were very pastel and so I had to walk away and decide what direction I really wanted to go.
I added some layers of acrylic and some papers. Still not happy. I added some stenciling. Getting better. I then added some gel medium via stenciling. Now this was getting fun.

Then came more Gelatos! I couldn't tell you exactly what colors I used. I do know that I used Snow Cone (the turquoise you see in the bottom left. It is also the bottom layer in the upper left which then had yellow applied over top to create that lovely spring green. The purple is either Grape or Raspberry and believe it or not I did not use any red to create that fabulous orange. It was all yellows and varying shades of pinks. I buffed some of the color off the gel medium circles using a baby wipe and then used Prismacolor pencils to make drop shadows. I blended them slightly with a blending stump.
I am not sure if this is done yet or not. I am really loving how it looks right now so I want to hold off for a while.

And now for a product I knew existed but never thought I would be interested in.....Gelli Plates.

You know something? Pinterest is costing me a fortune! LOL  I saw some cool art journal pages on Pinterest and the artist had used Gelli prints as their backgrounds which of course sent me off investigating. I knew mono printing and I had heard of Gelli Plates but had not really LOOKED at them. Big mistake. Now I own the 3x5, the 5x7 and the 8x10 is supposed to be delivered on Tuesday. (oh yeah, did I ever tell you that I cannot buy just one of something? lol)

I began by playing with the 3x5. My thought process was.....it will take less paint so less waste as I figure this out AND I literally have 100s of blank 4x6 index cards. I think there are 6 unopened packages of them on the shelf (see, can't buy just 1).


My very first Gelli print. Well actually this was the ghost print after my first gel print. I found a cool resist technique online using gel medium. I used Gelatos as my color over the top.
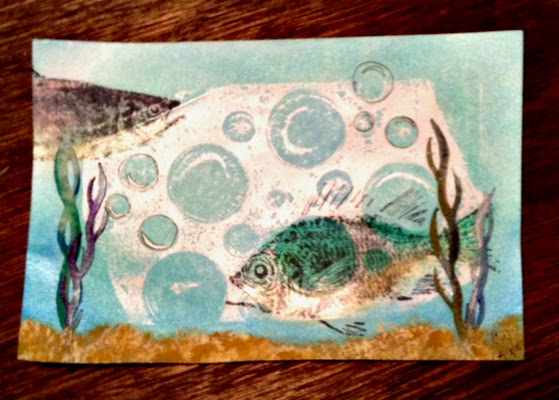
This was a stencil of various sized circles. I thought it was cool how it ended up with what looks like bubbles with reflections so I immediately thought....Fish.


Sorry, not a great quality photo (I took it with my ipad).
The fish are Fred B Mullett. Silver Salmon facing right. Menpachi facing left.
I rubbed on Gelatos to color the fish, added some seaweed cut on my Cricut Explore and pounced on some sand using acrylic paints.


Still more 3x5s. I created some tools by cutting up some craft foam with decorative scissors. I used one to create the squiggles on the 2 upper left prints.
I embossed some cardstock and then pressed the embossed sheet onto the plate to obtain the cool designs on the other prints.

I love this. Very basic yet very vibrant.

The colors got muddy in the middle but you can see all the clockworks from the embossed sheet.


And I did some experimenting with the 5x7.

I forgot to take a picture of this one before I began embellishing. It was pretty blah and I set it aside thinking it really needed 'something'.

Yesterday I was feeling a bit down, I sat at my desk, pulled out this print and was thinking I just wanted to splatter, layer and make a mess all over it to let out some of my frustration. And then throw it away. I didn't like the print anyway so it would be a good way to vent.

I grabbed the chicken wire stamp and stamped it in white pigment ink. Well duh. pigment ink is NEVER going to dry when stamped over acrylic paint so I had to either rub it off or heat emboss. I chose clear embossing powder so that it would remain white. I then stamped again in CTMH New England Ivy. I added the post mark in the upper left from Tim Holtz French Market set. I used StazOn jet black. It was odd, it did not want to stick and I had to stamp it a couple times before I got a print.

It still needed something and I still needed to work out some frustration so out came the Gelatos. I rubbed in some red, pink, turquoise and green. The more color I added the better I felt and the better I liked this print.

Now, instead of being my least favorite it is my most favorite. My next decision is "What do I do with it?" lol


Here is another 5x7. I almost forgot to take a pic again. As you can see I was already cutting before I remembered lol

I wanted to try combining my Cricut with my printing.


Because of the metallic gold, these were difficult to get a decent photo.


I love how they turned out. They will look great on a card or journal page. I love being able to combine lots of different art techniques and tools (and then I can justify owning all this stuff lol)

Sorry it has been so long since my last post and that this post is so long.

It has been a pretty rough past few weeks.
Our cat, Kitty, past away this past Thursday. He has been battling cancer since right before Thanksgiving. It has been very difficult to watch. Poor little guy wasted away from a healthy, feisty 12 pound boy to a frail little 8 pound baby in just a couple months.

But now the battle is over and he is at peace. The hard part is that we are now left trying to fill the void in our hearts.